

Update 7/26/15 – This has been a popular request! If you have trouble with any of the steps below, please email me! I am happy to walk you through it! If you just don’t want to mess with it, I now offer banner creation services! Check it out!
Update #2 6/3/16 – I have discovered a few helpful tricks to cut out some steps!!! YAY! Updated below!
Update #3 8/1/16 – I have found an even BETTER way to do it! Check out the second tutorial here!
Updated #4 7/1/2017 – Photobucket is NOT an option for hosting anymore! See bottom of post for new options!
Updated #5 6/15/2018 – Bitly is not an option for link shortening! It is marking image links as spam!
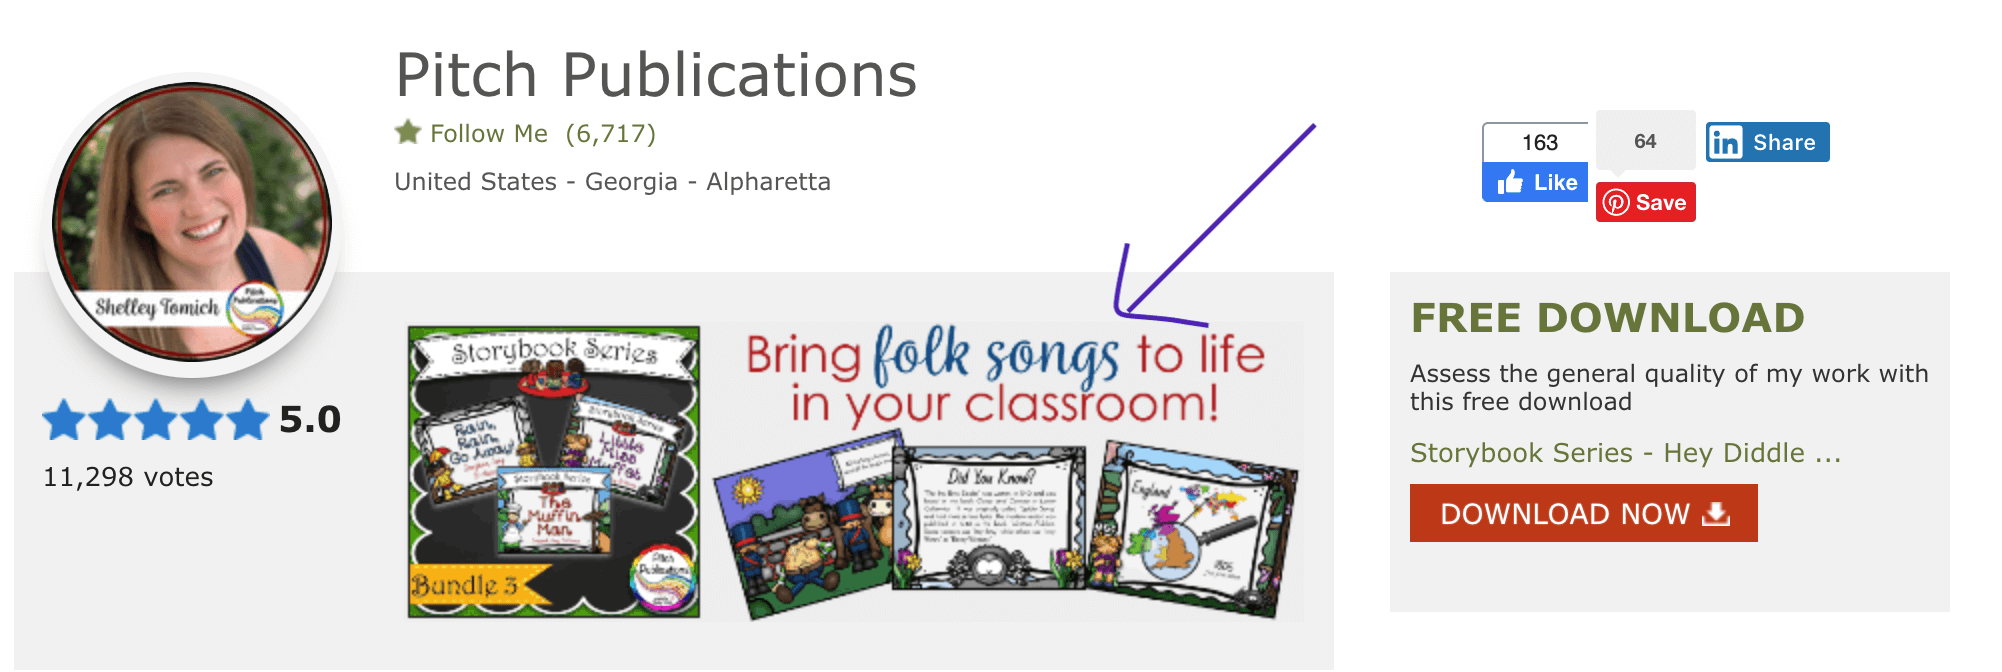
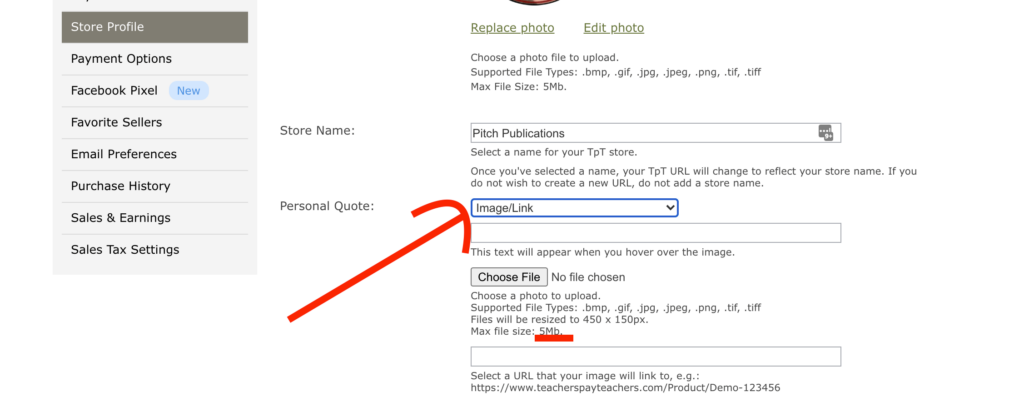
This is a tutorial on how to put an image in the space between your logo and your free download.
Note: This is not for the faint of heart. It is time-consuming and if you miss a step, extremely frustrating. I had a horrible, gigantic banner in my store for a bit before I worked it out. I still feel bad for the two followers who started following me during that period! 🙂
When you are done with this tutorial, link up your store at the bottom! I want to see your hard work!
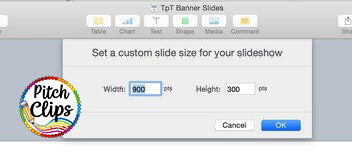
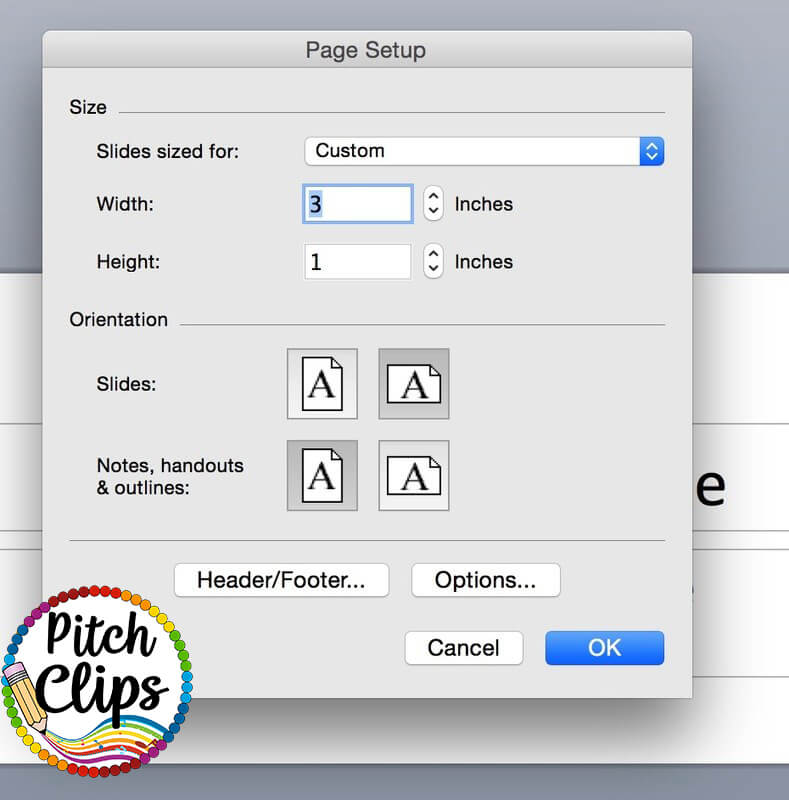
You really need to make a photo with the dimensions of 150 pixels by 450 pixels; PowerPoint and Keynote will not go this small so I doubled the ratio and will resize later.
There is not a limit to what you can put on here, though remember your buyers aren’t in your store to watch a slide show. 🙂 I have about 6 or so running in each store. As I have time, I hope to replace them seasonally.
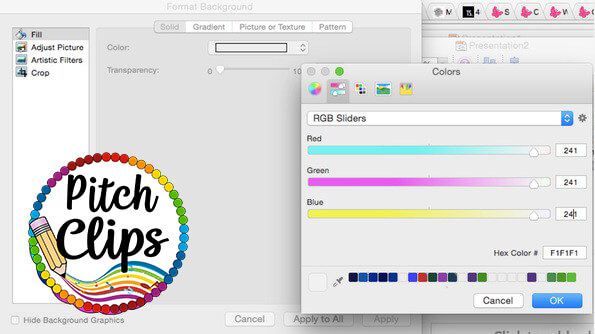
If you want the images to “blend” with the grey header space on TpT, then you need to set the background color to #F1F1F1. You can format the background of your slide (directions below) or insert a rectangle shape and recolor the shape (put it behind all your other content).
Powerpoint:
1. Format -> Slide Background.
2. Click Color.
3. Click more colors.
3. Click on the slider Picture and then select “RGB Sliders”
4. Type in 241, 241, 241 in the settings or F1F1F1 in the Hex code.
5. Hit Apply.
(Same process in Keynote, just use the format, slide background).
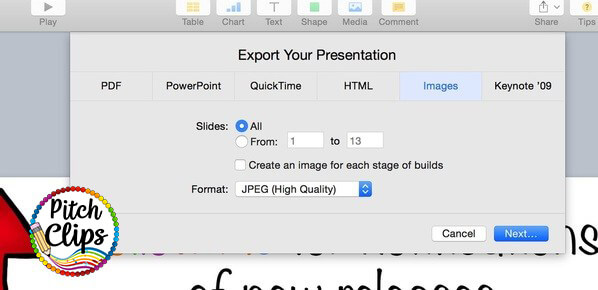
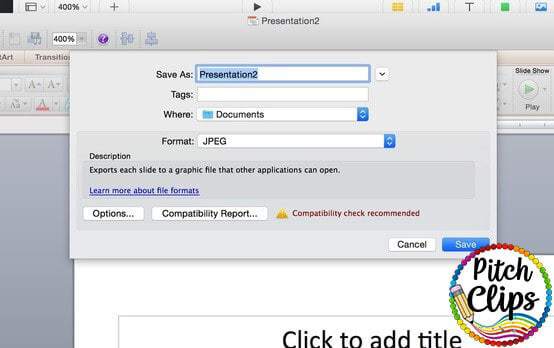
Export your images in your desired format. Both Keynote and PowerPoint will export images. In PowerPoint, it is File -> Save as Pictures. In Keynote it is File -> Export to -> Images. If you want your images to be clearer, you can increase the size of the slides.
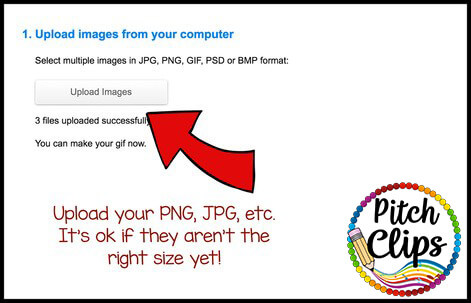

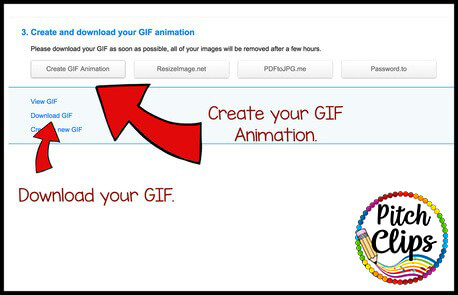
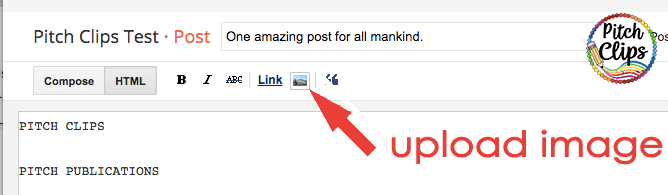
The next step is to upload your gif to the third-party hosting of your choice. Third-party hosting just means that you will use a link on TpT to point to an image somewhere else on the internet.
Alternatively, if your gif is below 5MB in size, you can upload it directly to TpT!
Do NOT use Photobucket.com anymore (this used to be the #1 option). Photobucket now charges $400 a year for this service.
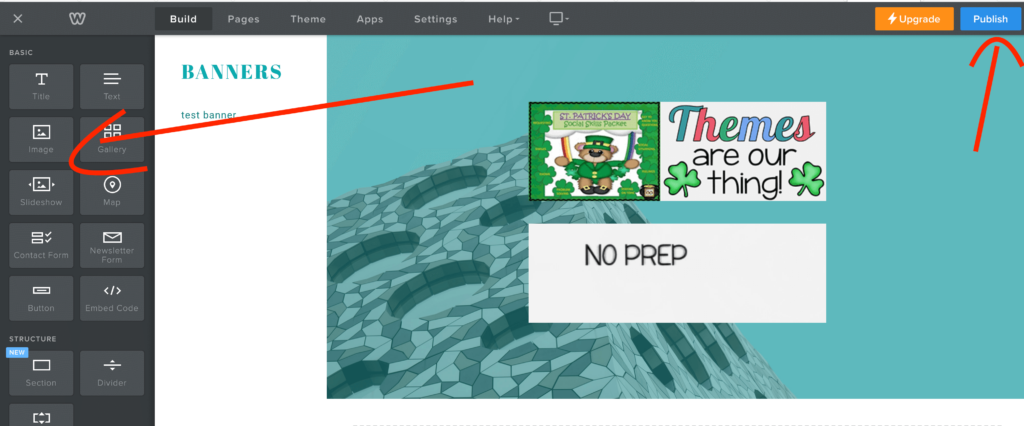
I will cover five options: Pinterest, WordPress, Blogger, Dropbox, and Weebly. I am hosting many of my smaller ones on Weebly now and larger on Dropbox.
You can use a secret board or a public board for this. Though I have not done it for my store, others have very successfully. Note: Your gif file cannot be over 10mb. I do not use Pinterest because many of my banners are pretty big.
1. Upload a pin as you normally would. If you are on a secret board, do not worry about where it points to or what the description is. No one is pinning it! But if you want to display it on TpT, then why not actually pin it too?
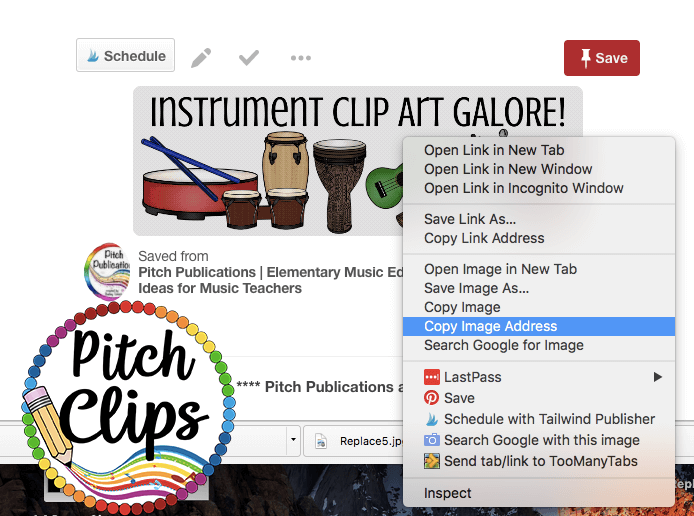
2. Go to that pin. Right-click and click Copy Image Address. This is the link you will paste into a link shortener in the next step. Note: Some people are reporting that Pinterest is not working right. But if you want to try to use Pinterest, go for it!
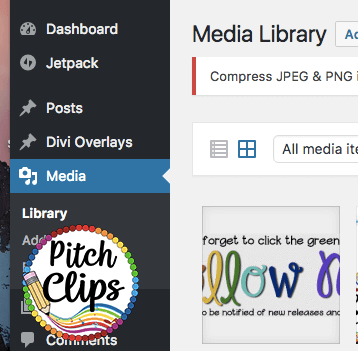
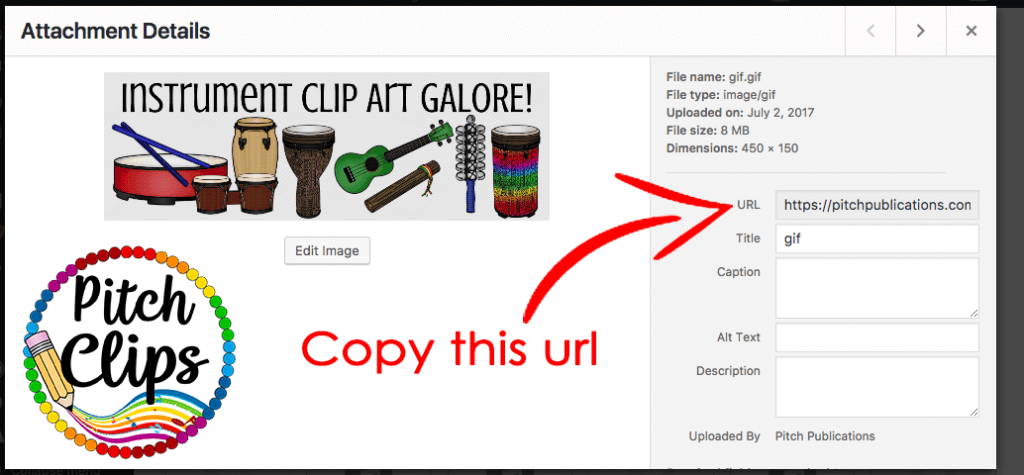
f your blog is hosted on WordPress, you can upload your gif to your media section. You do not have to put it in a blog post.
I used an old blogger blog I use for testing when I am coding for clients. I created a draft post (you don’t ever have to post it!). Note: I am getting some reports of blogger having issues! Use with caution!

4. Save your draft (you do NOT have to publish, but do save it!)
Note: I am having issues where Blogger is showing a triangle with ! for really large gifs. You will need to choose another option if you face this.

You can upload your gif to Dropbox. Get the link and then change the end to 1. So if you have
https://www.dropbox.com/s/5y7c4bc467k05nl/Linda%20Gif%20GenEd.gif?dl=0

Change it to

https://www.dropbox.com/s/5y7c4bc467k05nl/Linda%20Gif%20GenEd.gif?dl=1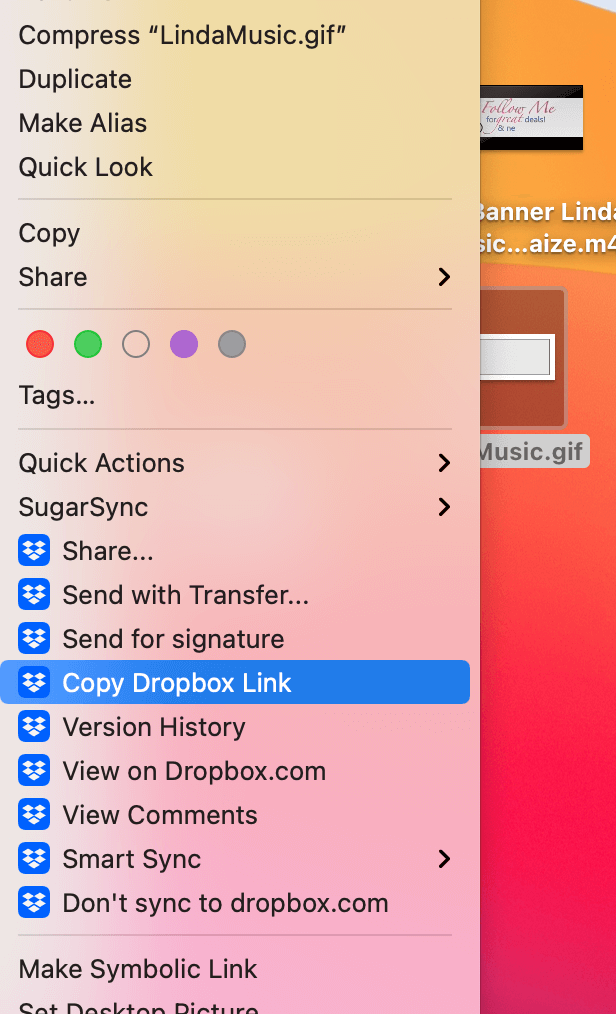

You must shorten the url because of the TpT restrictions on how many characters in your quote area.
NOTE: DO NOT USE Bit.ly! Bitly has started marking these images as SPAM and will not show it in your TpT store! Try one of these two things:
1. Tiny Url. Just paste your link and then copy the new one! A new link might look like this now:
https://tinyurl.com/123adfd5Repeat this process for both the destination link and image link.
2. Pretty Links. If you are on WordPress, install the plugin Pretty Links and you can shorten your links using your custom domain.
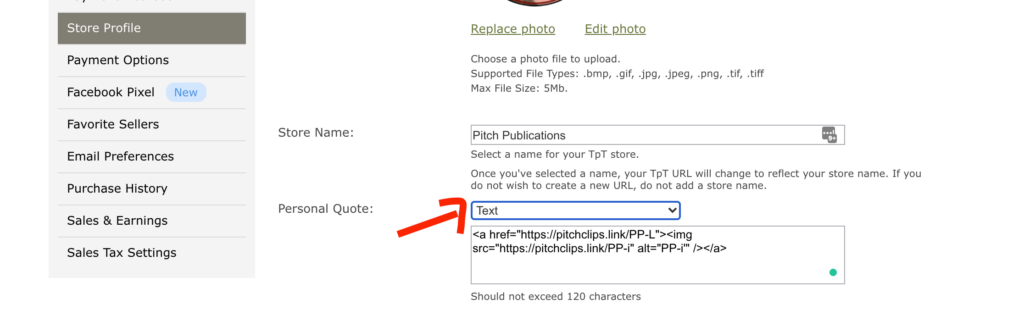
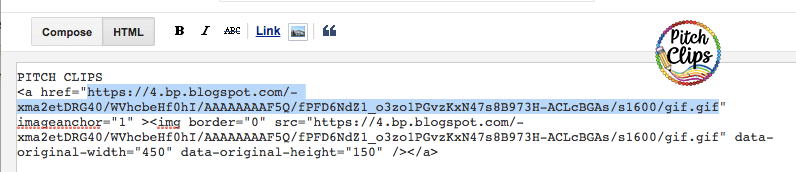
<a href=”DestinationLink”><img src=”ImageLink” /></a>*DestinationLink – Replace the word DestinationLink with whatever web address you want buyers to go to if they click your picture. TpT has now asked that we only link to links on TpT.
Note: You CANNOT put more than one link. I would love to link to each product, but we are limited to one link.
*PICTURE – Replace the word ImageLink with the link to your Gif.
*WIERD BUG – MANY people have had trouble with the correct code and the banner still not working. Turns out pasted quotes ( ” ) are having trouble rendering. So paste your code, then manually delete and retype each ” – this fixes the problem 90% of the time! (It has something to do with formatted code if you care, lol).
<a href=”http://tinyurl.com/tptquotebanner”><img src=”http://tinyurl.com/2sujZOy” /></a>

Which comes out to:

[ninja_form id=7]


206 Responses
Hi friend,
TpT will now allow sellers to host the rotating banner on site. Whew! This sure makes adding a rotating banner easier.
Yes! Though some people still have to use the old method if the file size is too big. 🙂
Hey Shelley this worked great. I initially had a problem getting it to work when hosting my image to Dropbox but when I hosted it on my WordPress server, it was magic.
BTW I created my animation in Photoshop CC. Lots of control over the individual elements.
Thanks again for your kind comments! Glad you found a great way to make it work!
Wow. Wow. Wow. This tutorial is EXACTLY what I was looking for!!! Thank you SO VERY MUCH, Shelley!!
It’s not perfect, but I’m pretty stinkin’ proud of it, if you’d like to check it out:
https://www.teacherspayteachers.com/Store/Still-Small-Voice-8725
You’re the boss, applesauce!!
– Ash
Thank so much! So glad I could help! It looks great! If you need help resizing it, let me know! Otherwise it’s awesome!
This was fantastic, thank you for your help! I officially have a fancy gif banner on my store :-).
Wahoo! So glad I could help 🙂
Thank you!! I was trying to use Bit.ly and couldn’t figure out why it wasn’t working. Your tip about using Tiny URL solved my problem. I am so thankful I found this post!
Yay! So glad to help!! 🙂
I did it! Thank you so much. The directions were clear and helpful. My store looks beautiful 🙂
Wonderful! I am so glad it worked! Looks great!!
Thank you so much Shelley! This tutorial was so helpful! I had always wondered how teachers were getting those images on their stores. Now I know. Thanks!
Glad to help, Jean!! 🙂
Thanks for your help. After having to take down the original photobucket banner, it looked so bland! Thanks for helping to spruce it up!
Anytime! Glad to help 🙂
Hi Shelley,
I’m having the same problem as Anna. My banner is too long. I made mine 1×3 inches like I always do and it looks way bigger than the images in my gif. Any suggestions?
Hey Amanda! Have you tried resizing your gif in one of the gif creation programs? Sometimes 1 by 3 inches exports at the wrong pixellation based on DPI (did that make sense at all?? :/ ). Anyway, if you still have problems, shoot me an email at [email protected] and I can try to help! 🙂
Thank you! After spending hours watching various tutorials that don’t work for me, this one did! At least now I can change it around and improve it…thanks!!!
Yay! So glad it worked!! =)
This is the best tutorial I’ve found! Thank you so much for sharing this info! Your step-by-step instructions worked perfectly!
Thank you so much, Corinne! Glad to help! 🙂
I did it!! I thought it would be difficult but your help was amazing! Thank you so much!
You are so very welcome!!! Cute banner!! 🙂
You saved me again! Thank you so much! 🙂
Shelly,
You’re directions were fabulous! I got it the first time I tried and couldn’t believe it! Many thanks:)
You are so very welcome!! 🙂
Wow!!! Thank you!!! I was able to get it on the first try!!! I wished I would of found your tutorial two nights ago. Your step by step directions were so easy to follow. Thank you so much!!! 🙂
Fabulous!!! So glad to help! I just peaked at your banner – super cute!!
Thank You!!! I could not make my images the proper size in PP, and this finally helped me figure out how to do it (like on the 10th attempt). By the way, Literacy by Lulu gave me your name.
Can you tell me where I would find the link to my GIF…..I have everything complete, but I’m not sure where to find that? Is it where i pinned it on Pinerest??
Hey Marissa! If you go to the pin and click on it, let it pop up, and then copy and paste the link. Then shorten it with bit.ly and go from there. if that doesn’t make sense, shoot me an email at [email protected] and I’ll do my best to help you more! 🙂
I can’t thank you enough! Needs some tweaking, but that worked! 🙂
Thank you for coming to the rescue AGAIN! I discovered this morning that my rotating banner was gone and replaced by a notice from Photobucket that they now require $400 for 3rd party hosting. Not very nice of them! An email could have been sent out which would have been a better way to approach this. At any rate, a few friends and I problem-solved through this with your help. Thanks again!! Tracy (GoldCountrySLP)
You are so welcome!!! 🙂 I was SOOOO annoyed by the Photoshop debacle. GRRRRR!!!
So glad you guys were able to work it out! Happy creating!
THANK YOU for updating this post! I used your original post to begin with, but since photobucket is charging, I had to update.
Your directions were extremely easy to use. I had to delete the ” and reinsert them, then it worked like a charm!
Yay! And I know the ” problem is also annoying – took forever to figure that one out!! 🙂 Glad to help!
Shelley
Thanks so much! Your tutorial was the only one that worked (and was non-tech user friendly) to fixed my quote box after Photobucket stopped hosting it.
Yay! So glad to help out!!! 🙂
Fantastic! I may need a few edits but I DID IT! Thank You!
Wahoo! Glad to help!! 🙂
This is the best tutorial! Thank you so much!
Aww, thanks so much!!!
Thank you. I followed your instructions and got it to work on the first try! So thankful for the time you just saved me! 🙂
Hey Kristin! You are so very welcome!!! =)
Yaaaaay! I did it. Thanks to your blog post! Creating this tutorial was very generous of you and much appreciated by many.
I did start by creating the 3 x 1 inch slides in powerpoint. When I went to change the size of the slides in sumopaint, they became extremely blurry, like mentioned in some of the comments. So, I went back and changed the size of my original slides to 4.688 x 1.563 inches, like stated in one of the other comments. It worked for me as well so, I was able to skip the resizing step and go straight to creating the gif.
Thanks again for this amazing tutorial!
Yay!! You are so very welcome! 🙂 I’m glad you were able to troubleshoot the sizes 🙂 It can all be tricky! I just took a peek at your store – LOOKS GREAT!!!!! 🙂 (PS I’m in Georgia too! Hello to my fellow southerner! 🙂 )
Hi there! Thank you for your post! It was very helpful. I was so excited because I followed all steps correctly. It is when I got to the end where I found trouble. I posted this html code into my link: . But then when I click edit, it did not add and the html code then turned into when I went back to edit my profile again. Do you happen to know what I am doing wrong?
Going to email you!! We will get it straightened out 🙂
Hey there! Awesome post, thank you so much for sharing. I am confused as to why it is not working in my profile however. I followed all the steps correctly and came up with this html:
but when I hit edit it doesn’t work. Then when I got back in to fix it the section says: . My link is GONE! Do you know what I could have possibly done wrong?
Thanks for your help!
Hey Megan! I will shoot you an email, the html you posted is not listing here, but it came through in an email. I think I know what happened, but will confirm via email. We will get you straightened out! 🙂
This was sooooo incredibly helpful. Thanks for including step by step instructions + visual aids. I am IN LOVE with my store now 🙂
Yay! It looks amazing!!!
This is SO awesome! Clear, concise, and frustration-free! 🙂 Thanks so much for sharing your wisdom. This was much easier than I anticipated.
FANTASTIC! I’m so glad!!!! 🙂
It was very clear and concise and even someone like myself with my limited computer abilities was able to make a gif.
Thanks for the feedback! 🙂
That was awesome! Your directions were spot on and easy to follow. One of my pictures is kinda of blurry, but I’ll go back and play with that later! Thank you so much! ~Paige
Fantastic! I just glanced at it and it looks pretty good to me! It will never be super crystal clear mostly because of the size restrictions.
Shelley, thanks so much for this tutorial! I had so much creating my little gif:) Dinah
Hey Dinah! I just ran to your store and it looks darling!!! Great job!!! 🙂
I woke up early and saw this post on the FB Teacherpreneur Tribe page. SO GLAD you posted this as I LOVE my new gif for my store! I used Pic Monkey instead of Photoshop and Google Drive instead of Photobucket, but it all works so similarly that I had no issues. Thank you!
Yay!!! It looks AMAZING! =)
Thank you so much for your help with this. It worked, only I used picmonkey.
Wonderful! 🙂 I hear great things about picmonkey!!!
Thanks for this tutorial! I also had trouble with blurry images. What I did was change the custom size in powerpoint from 3:1 to 12:4 then resized in Sumopaint! It worked perfectly! I’m still not thrilled with my rotating GIF but now I know how to do it! Thank you!
I’m so glad you found a work around! 🙂 Yay!!!
What a wonderful post! Your directions are very clear and super helpful. Thank you!
Thanks, Linda! You are so welcome!!
This was so helpful! It took me a while to go through the steps and everything but was very well worth it! Thanks for this great tutorial!
Glad to help! And yes, I have done dozens now and it still takes me awhile! 🙂
Just made another one! You’re awesome! Thanks for teaching me how to do all this fun stuff!! 🙂
No Problem! So glad to help! 🙂
I couldn’t get my pictures to upload to the free Giff maker website. I had to use another website that leaves their website attached to my Giff. Do you think I couldn’t upload them on your website that you suggested because I am using Safari?
Hey Shea! I found that if you exported them as .jpeg then Giff Maker doesn’t like it. Check and make sure you take out the “e” and make them .jpg. When I did this they worked fine. If that’s not your problem, shoot me an email at [email protected] and we will see what we can do. 🙂
I am slowly but surely getting it. My images are too big. Thanks for sharing this! You are so talented! 🙂
Hey Beth Ann! If you still have problems with the images shoot me an email at [email protected]! I will do what I can to help out! 🙂
Thank you very much. This was so helpful in finally getting my rotating banner up at my store. https://www.teacherspayteachers.com/Store/Moore-Resources Thank you again for sharing this information.
It looks awesome! Great job!
Thanks so much! How generous of you to take the time to send us the step-by-step directions. I’m thrilled! Are there two ways of doing the HTML? I used a slightly different HTML code from the one you listed in Step 9. I used “PICTURE”> instead of “PICTURE” />. Feel free to check out my animated GIF! Thanks again!!
Hi Ann! I think leaving out the / is probably ok. 🙂 Test it – if it works, go for it! Can’t wait to visit your store! 🙂
HURRAY! I did it! Thanks for this post Shelley!
You are so welcome! Looks great!
I did it! I did it! Thank you so much for this thorough blog post! 🙂 https://www.teacherspayteachers.com/Store/The-Clever-Teacher
Awesome! It is adorable!!!
Thank you SO MUCH! I followed your steps exactly as directed and I love my new rotating banner!!! I’m going to just sit and stare at it for a bit 🙂
HAHA! I did that too at first! 🙂
YAY! Thank you so much! I was nervous but your very clear directions with pictures and links totally made me successful! Thank you for all you did to help us! : )
Awww, you are darling! Glad it helped!
Just adding my Thanks! to the list. Your tut was very helpful and my banner looks great.
Wonderful! So glad it worked for you! 🙂
Thank you SO much for that tutorial. It was very clear and concise and even someone like myself with my limited computer abilities was able to make a gif!
That is wonderful! Yeah!
Thank you so much for sharing these instructions – so clear and concise!
You are so welcome!
Oh my gracious… that took me about 3 hours (I’m mentally exhausted), but I’m celebrating this personal technological victory!! Thank you for helping all of us out with these directions. I had to change up a few of the steps, but your tips and tricks were perfect for getting me to the end! 🙂
Wonderful! Yeah, this is not for the faint of heart! 🙂
Thank you soooooooo much for this. I’m not even at the GIF stage, but your directions helped me with the picture. You’re fab.
aw, sweet! Thank you!
You ROCK! Thank you for the step by step details!!
You are very welcome!! 🙂
Thanks so much! It’s a bit grainy, but I’ll worry about that later. I’m thrilled it’s actually working.
Yeah, the size limit of these things can often cause a bit of blurriness. Try exporting as PNG – sometimes that keeps it a bit crisper.
It worked!! Thanks so much for making the steps clear and easy to follow.
You are very welcome!
Thank you for this tutorial. It was easy to follow and execute. I did it in only 2 hours. The hardest part was deciding on what to put on my slides. I ended up not putting a link just the rotating banner as the link made my url too long.
Hey Katherin – it is time consuming, isn’t it!?!? Hint: try bit.ly for both links and it should work out on the link size 🙂 Yes, the hardest part for me is the design too!
Thank you so much for the tutorial you made! It was easy to follow. I appreciate the time you spent in creating this for non-techies like me. My banner has been up for about a week and I think it’s making a significant difference in my number of followers. It still needs a little tweaking, but here it is: https://www.teacherspayteachers.com/Store/Gnature-With-Gnat
It looks so good!! Great job!
Thank you SOOOOOO!! much for this tutorial. It was very helpful.
You are so welcome!!!
Thank you so much for these easy to follow instructions!
Awesome! Thanks!!
Thank you for the explicit directions! I don’t use PowerPoint or Keynote but I know how to make png slides using Pages and my iPhoto program to crop! I did sidestep the download of the gif to my computer as was suggested in the forums and went directly to Photobucket with it. This time it worked! Someday I’ll go back and redo some of the slides to make them more colorful but I’m happy that I got the animation to work! Thanks again, Shelley! We need another Atlanta meet-up! Linda
Yeah!! Looks awesome! We definitely need another meetup – it was so fun! 🙂
Thanks you so much! I did everything in Keynote and it worked wonders! You Rock!
Aww, thank you so much! 🙂 I love Keynote!
Thank you so much!!! I was able to figure this out pretty easily! Hopefully someday TPT will figure out a way to prevent us from having to use code, but until then, I appreciate your step by step explanation! Mrs. Thomas’ Teachable Moments
It looks AMAZING! And yes, I hope TpT will do away with the code one day and have a more “blogger” like interaction. But until then, so glad I could help!
Hi Shelley, Thank you for amazing tutorial! You made it so, so easy to follow. I would have never tried this on my own. When I put my rotating banner into TPT, my freebie box is covering the right side of the banner. What am I doing wrong here? I don’t see that anyone else has asked about this. Thank you SO much for your help! Lauren https://www.teacherspayteachers.com/Store/Teaching-In-Stripes
Hey Lauren! The banner is adorable! It looks like all you need to do is resize your images to 450 by 150 using GIMP (a free program). If you are feeling lost, shoot me an email and I will help you out! 🙂 Shelley [email protected]
Thank you so much for your tutorial. I tried 2 other such wonderful people with instructions but for some reason it just didn’t work well. Then I came upon you! The only thing different was to take the resized images and save each one to my desktop as a png. Then I uploaded to gifmaker. As you can see from my store, I still don’t have the background color perfect and I have used the color picker but for some reason its still a little off. However, the problem I was having previously was excessive blurriness on the cover pics is now much better. Thank you thank you!
Hi Mary Ann! I would not recommend using color picker because for me the color is always slightly off. Normally it is not a big deal, but for this it needs to be an exact match (or ever so slightly off). Best thing to do is put in the actual hex code. If you email me at [email protected] I can help you get your slides recolored 🙂
By ever so slightly off I mean you could use F2F2F2 instead of F1F1F1. On 99% of monitors this change would not be noticeable. But color picker often is way off. (Was that too much tech talk? So sorry if it was! I’m still here to help! 🙂 )
Thank you so much! I’m just getting started with my store. I really appreciate anything that will “schnaz” it up! I am looking forward to learning more from you! Sandy
Oops! That comment and my website didn’t work so well. This post should have it all set! LOL! Sorry. 🙁 Sandy
No worries! I am just so glad it worked for you!
This was so helpful! Thanks for providing links to the sites I needed for each step!!
You are so very welcome! 🙂 So glad it worked for you!
Yay!! Thank you! Your step-by-step instructions were awesome!
You are so very welcome! I’m glad it worked!
That was so helpful! Just an FYI, you can’t host your .gif on Google Drive or Google Photos. Even when you get the direct shareable link, it didn’t work for me, but when I used Photobucket, it worked great. Thanks!
Hi! So glad it worked 🙂 Thanks for the tip! I have only used Photobucket myself! Good to know Google drive is a no-go (though that stinks!). Thanks for linking up!
Thank you for this tutorial! It worked perfectly when I read all the directions. 🙂 I was actually able to skip Step #5 by setting my PowerPoint slides to 4.688 x 1.563. Thank you so much for this! I greatly appreciate it, and I’m your newest follower! =) ~Heather aka HoJo~
Hey Heather! You are so welcome! Awesome tip! Thanks for sharing and I’m soooo glad it worked for you! Looks great in your store! 🙂
Thank you so much for the awesome tutorial! I linked up-still need to go back and adjust the background color but will do that later!
Hey there! You are so welcome! All you have to do is fill the background with color F1F1F1 or you can put a rectangle that is this color and send it to the back. Email me at [email protected] if you need help! 🙂
Awesome!! Thanks so much for this!!
You are so very welcome!! 🙂
Thanks so much! I know I will play around with this some more, but I love it!
You are so welcome! Let me know if you have questions or need help along the way! 🙂
Oh my gosh! Shelley, this was the best tutorial ever! Your instructions were so easy to follow! Thanks so much! Thanks also for hosting such a great linky! I love it!
Hey Najda! You are so welcome! The banner looks great!!!! 🙂 Awesome! 🙂
Ahhh I finally did it! Thanks for the tutorial, Shelley! I wish I would have realized how small the text would be while creating but I think it still looks good!
Kelsey it looks awesome! And if you ever decide to update it you will know what to plan for! 🙂 Great job!
Help! I have resized all my images to 450×150. Then I upload to the gif maker– it all is the right size. I put it into photobucket, save the link, and use bitly to make is smaller. But when I put it all in TPT my pictures are hanging over the edge? Not sure what is happening? Any advice would be greatly appreciated! https://www.teacherspayteachers.com/Store/Hanging-With-Mrs-Hulsey
Hi Anna! I saw you got it fixed – yeah! Looks AMAZING! 🙂
Oh. My. Gosh! Thank you so much for this tutorial! I spent hours attempting this the other day following a different set of directions. I thought I would take another stab at it today using your directions. It seriously worked the first time I did it! Thank you so much!! Katie
You are so very welcome! I am thrilled you got it done! Off to check the latest link-ups! 🙂
This is great! I am having trouble making the images clear, though. The instructions (via Microsoft) are complicated and there are warnings about messing up the whole program if you make a mistake altering the registry, so that is disappointing. Not a risk I’m willing to take. Any tips that are simple to make the images clear enough to use?
I am not sure which instructions you are talking about and I have never encountered the “registry” problem. Email me at [email protected] and I will do my best to help you out! Most likely you just need to start with a bigger slide size and/or when you click “save as picture” go into options and adjust the resolution. I can help you better if I can see the file. Shoot me an email! 🙂
Hi, There isn’t an option for either png or jpg to re-size on my version of ppt. So, I found another solution! Save to pdf first-before re-sizing. When you convert from pdf to jpg you can re-size the image and there are a LOT of options. I re-sized to 300 dpi, but may go back and enlarge them again just see what it does. This definitely improved the images on slide show banner!!!!! Yay!
This is so fantastic! Thank you so much for the easy to follow tutorial! Worked like a charm!
Looks great! 🙂 I’m so glad it worked so well for you! 🙂
You are THE BEST! Thank you so much for this tutorial–so thorough and helpful! Thank you!!
You are so very welcome! 🙂
Thanks so much! I used Pinterest instead of Photobucket…:) just another option!
Awesome! What a great idea! 🙂
Hi! Thank you so much for your tutorial! I have my new banner up and running. It is a work in progress but it’s nice to see that it can be done. Thank you for taking your time to help us all out! All the best, DianaJo
You are very welcome! 🙂
Thank you so much! Your post was spot on and so helpful!! I am so happy with my results and LOVE the linky so we can see each others! You are making me so happy today!! 🙂 Laura
Aww, this comment made my day! TpT and other people have given so much to me and my family! Least I can do is help everyone else out! 🙂
Thanks so much for these easy to follow directions. Mine are very blurry as well. I tried your suggestions above and I tried saving as a PNG. Still really blurry. I used ppt, and SumoPaint. Here is what I noticed. In step 5 for Resize Images, your percents are 25 and 24. Mine are 156.25% and 156% when I change my width to 450 px and height to 150 px. I can’t find a way to change them. Everything else has worked perfectly. I just can’t use it because of the blur.
I would have to see your powerpoint file to really know what is going on, but when you saved it as a PNG or JPG did you go into options and increase the resolution as much as you could? If this still doesn’t work, email me at [email protected] and I will help you out best I can!! 🙂
Oh my goodness!! Thank you so much! I managed to successfully put up a banner slideshow thanks to your amazing tutorial….and all of that while having a child on my lap. That says a lot for your easy to understand and clear directions. Thanks to this tutorial I was introduced to your website and now I’m learning all sorts of other things (like Tailwind!!) Thank you SO much!! ~Sonja
You are so welcome and I am soooo impressed! I have three little ones 5 and under so I TOTALLY GET IT! I could have never have done this with my kiddos around! 🙂
Thanks so much! I had no idea how to make an animated GIF. Your instructions were so helpful 🙂
Here’s our store!
The link isn’t working for some reason 🙁 Here is the URL https://www.teacherspayteachers.com/Store/2-Smart-Chicks Thanks again!
WOW! It looks awesome!! I love seeing these!
Thank you so much!! This was a great help!
You are so welcome! 🙂
Thanks so much for the clear directions. I was successful in creating and uploading a GIF for my store, although the images are a little blurry, so I’ll have to play around with that. I love learning a new skill!
I have heard people trying to export as a PNG first will help. Mine too are just slightly blurry, but I also think the size of the image doesn’t help this! 🙂
Thank you so much for your post! The directions were really easy to follow, which I have found isn’t always the case with online tutorials. The hardest part was deciding how long the animation time on gifmaker should be. I went with a longer duration to give people time to read everything and not get dizzy with the images flashing by quickly but I’m no sure if it’s long enough. I have bookmarked this page so when I want to revise this section, I’ll be able to find you again easily!
Fantastic! I have gone back and forth with the time quite a bit myself! I might adjust it on my next update! 🙂
Thank you SO MUCH! I’ve tried so many times with other tutorials and gave up. I didn’t create a slideshow, but I used your directions to put up a static image and I love it! Thanks for taking the time to show us! Deirdre
You are so welcome! 🙂 I’m glad it was useful and I can’t wait to check out your store! 🙂
I need to revise it a bit …but I have completed a rotating header.. thanks to YOU! Thank you so much for sharing your knowledge Shelley!
My pleasure! I’m so glad it is helpful! 🙂
It worked! Check mine out here! https://www.teacherspayteachers.com/Store/Lit-With-Lyns
Looks FANTASTIC!! YEAH!!!
Thank you, thank you Shelley! This is on my to-do-list this week – it’s been on the list for a long time and I’ve been dreading it but you made me move it up!!!
You are so welcome!! 🙂 Can’t wait to check yours out!
Make sure everyone link up your store above with your rotating banner! 🙂 I would love to see them!
Oh, I didn’t see that. Will do.
I just finished doing this to my store. It was A LOT of work, but the results are fantastic! Thanks Shelley for taking the time to share this information. You are talented and generous!
You are so welcome! 🙂 Looks great, Linda! Make sure you link up your store above! 🙂
I cannot thank you enough for this tutorial! I found two other tutorials before this one and was about to pull out my hair with frustration! The coding was missing one important detail in their posts!!! UGHHHH!!! This worked perfectly and was easy with my hours of experience in trying it already! Thank you!!!
You are so welcome! I had some of the same frustrations when I started – believe me, it wasn’t a one time deal for me!
Woohoo! I can’t wait to try this!
Thanks for visiting! 🙂
Oh, I love you so much for this!! Just finished mine! Thank you! Thank you!
Oh fantastic! And you are so welcome! Post a link here! I’d love to see it! 🙂
AWESOME tutorial! Worked perfectly! Thanks so much.
You are so very welcome! 🙂 I checked out your store- looks AWESOME!
I found this site that has the conversion of color codes from #xxxxxx to the RGB code for PowerPoint. That gray is R241 G241 B241 so you can set the background to that color.😊 http://www.color-hex.com/color/f1f1f1
Oh my goodness! Thank you so much for sharing! I will update the tutorial with this information! 🙂
Thank you so much for sharing about this! I shared this idea as a part of May’s You Oughta Know Blog hop so I hope many people will be coming to visit your store and blog 🙂
Oh, thank you so much! I hope it has been super helpful to a lot of people! 🙂
Do you know what would cause it to turn out super blurry? Thanks for any help you can give.
Hi! Did you export to jpg from PowerPoint? If so, then it automatically exports at 72 dpi. Couple of ways to solve this. 1) You can set the page size to crazy big (but keep the ratio 3:1) so you would want to do maybe 30 inches by 10 inches. 2) When you do File-> Save as Pictures, Click Options at the bottom left and then set the bottom numbers as high as they will go (Usually 2999) Hope that helps! If it doesn’t, tell me what programs you are using and we will try to work it out! Shelley
Thank You!!! You’re amazing! I’m going to try it out next week!!! Woohoo!!!
Wonderful! Good luck! Come back and post when you do!
You are so talented. I’m going to save this and come back when I actually have time to apply it to my store 🙂
Aw, thanks!! Yeah, it took me a good afternoon the first time! 🙂 Good luck! Come back and post when you are done! 🙂