Updated 7/16: More instructions for my PC friends!
Updated #2 7/1/2017 – Photobucket is NOT an option for hosting anymore! See bottom of post for new options!
Updated #3 6/15/2018 – Bitly is not an option for link shortening! It is marking image links as spam!
You can make a video, and turn it into a GIF with all sorts of fancy transitions, pictures, etc. The sky is the limit! (Though remember no sound on GIFs!). You can use this for your quote area, for custom pins, for promo pics, anything!!
When I figured this out while working on someone’s custom pin for Pinterest, I literally stood up at my desk and yelled for joy! (Yes, I really did).
First, this process is an update to the first tutorial I wrote on making Gifs. If you just want a simple rotating GIF, this still works great! Everything used is FREE and EASY!!! Now to the nitty gritty of the new process. I am showing you how to use this to make a new quote box image for Teachers Pay Teachers, but you could make promo images, custom pins, etc. with this!
Mac
PC
Also, I tested Instagiffer on the Mac and it worked, so I assume that it would work similarly on the PC. Some people also suggested GIF Animator. I have not tested either of these on the PC. Please report back if you do!
There are several ways to do this.
Here is a quick video of adding some animations to the custom pin for this blog post!
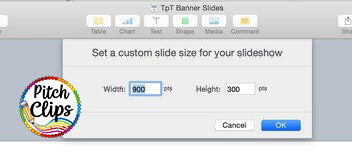
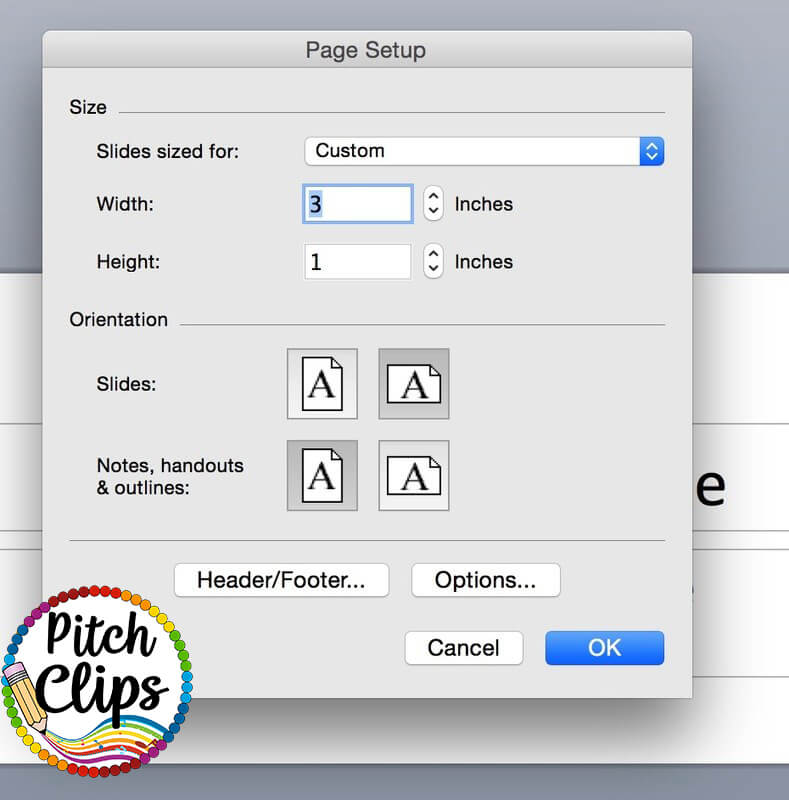
*Note: make sure you set the dimensions of your keynote or PowerPoint to the desired size for your project.
Canvas size Size
You really need to make a document with the dimensions of 150 pixels by 450 pixels; PowerPoint and Keynote will not go this small so I doubled the ratio and will resize later.
Alternatively, you could use a service like PicMonkey to get the dimensions right from the get-go!
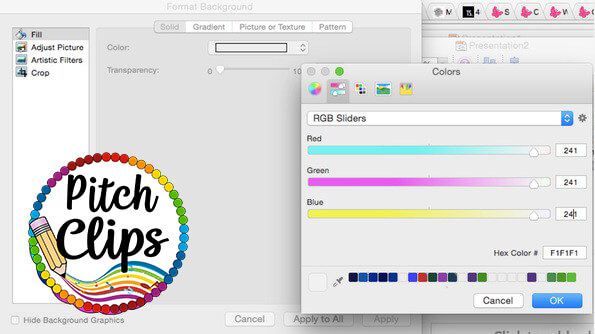
If you want the images to “blend” with the grey header space on TpT, then you need to set the background color to #F1F1F1. You can format the background of your slide (directions below) or insert a rectangle shape and recolor the shape (put it behind all your other content).
Powerpoint:
1. Format -> Slide Background.
2. Click Color.
3. Click more colors.
3. Click on the slider Picture and then select “RGB Sliders”
4. Type in 241, 241, 241 in the settings or F1F1F1 in the Hex code.
5. Hit Apply.
You can now skip step 4 below if you want to!
(Same process in Keynote, just use the format, slide background).
In the video below, I exported at a lower resolution. However since making this video, I now export at a high resolution and then use the gifmaker program to resize.
KEYNOTE
POWERPOINT – Office 2016 (365 Subscription) on WINDOWS ONLY
**Note: If you have PowerPoint for Mac, You can NOT export directly to a movie. However you can get around this by doing a screen capture movie using Quicktime (included with mac) or Screencastomatic. One of the many, many reasons I love Keynote! ***
I found a great tutorial on how to export to video on Powerpoint for windows! 🙂 I have not tried this myself, but I hear it works great!
Check out my process here:
If you want an awesome overview of this program, watch this video:
I know some of you don’t want to pay 4.99 for this program OR you might be on a PC. Here are some alternatives for you:
The next step is to upload your gif to the third party hosting of your choice. Third party hosting just means that you will use a link on TpT to point to an image somewhere else on the internet as TpT will not allow you to upload the image directly.
Do NOT use Photobucket.com anymore (this used to be the #1 option). Photobucket now charges $400 year for the this service.
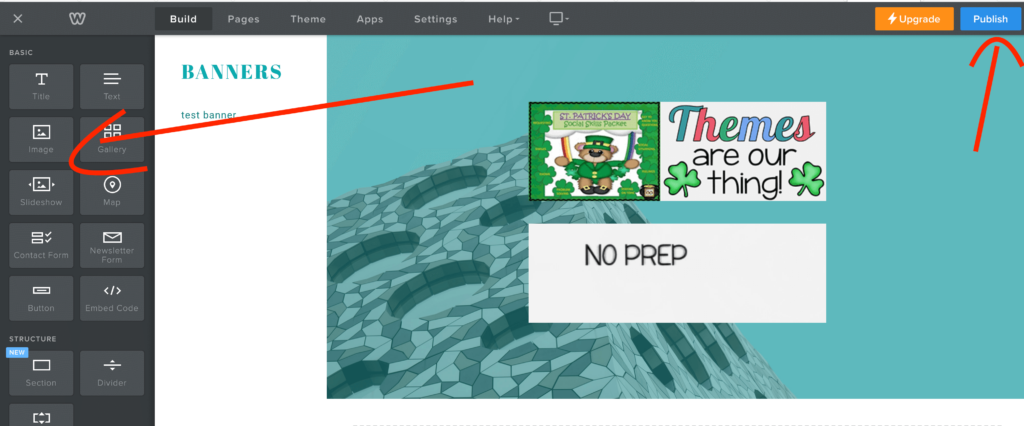
I will cover five options: Pinterest, WordPress, Blogger, Dropbox, and Weebly. I am hosting many of my smaller ones on Weebly now and larger on Dropbox.
You can use a secret board or a public board for this. Though I have not done it for my store, others have very successfully. Note: Your gif file cannot be over 10mb. I do not use Pinterest because many of my banners are pretty big.
1. Upload a pin as you normally would. If you are on a secret board, do not worry about where it points to or what the description is. No one is pinning it! But if you want to display it on TpT, then why not actually pin it too?
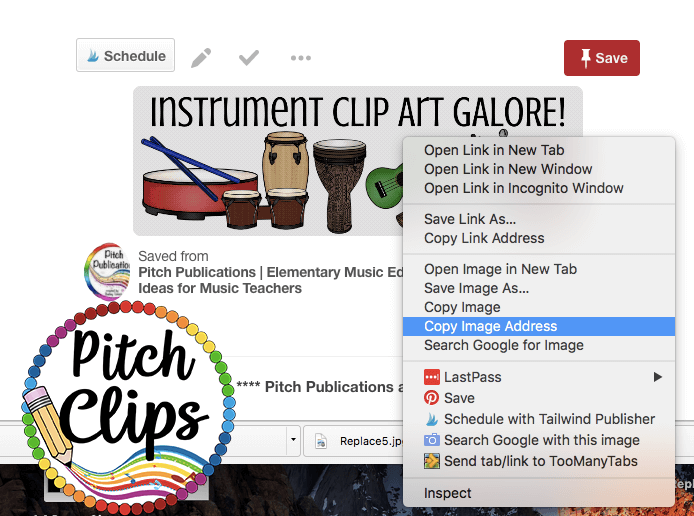
2. Go to that pin. Right-click and click Copy Image Address. This is the link you will paste into a link shortener in the next step. Note: Some people are reporting that Pinterest is not working right. But if you want to try to use Pinterest, go for it!
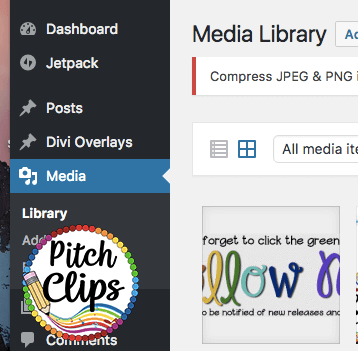
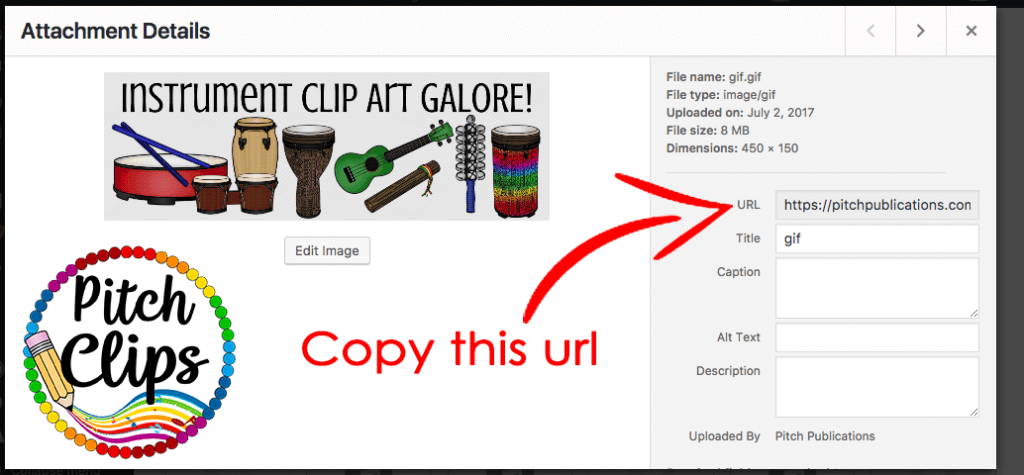
f your blog is hosted on WordPress, you can upload your gif to your media section. You do not have to put it in a blog post.
I used an old blogger blog I use for testing when I am coding for clients. I created a draft post (you don’t ever have to post it!). Note: I am getting some reports of blogger having issues! Use with caution!
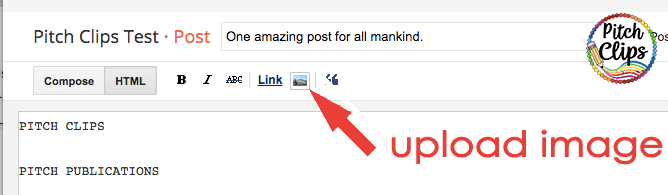

4. Save your draft (you do NOT have to publish, but do save it!)
Note: I am having issues where Blogger is showing a triangle with ! for really large gifs. You will need to choose another option if you face this.
You can upload your gif to Dropbox. Get the link and then change the end to 1. So if you have
https://www.dropbox.com/s/5y7c4bc467k05nl/Linda%20Gif%20GenEd.gif?dl=0

Change it to

https://www.dropbox.com/s/5y7c4bc467k05nl/Linda%20Gif%20GenEd.gif?dl=1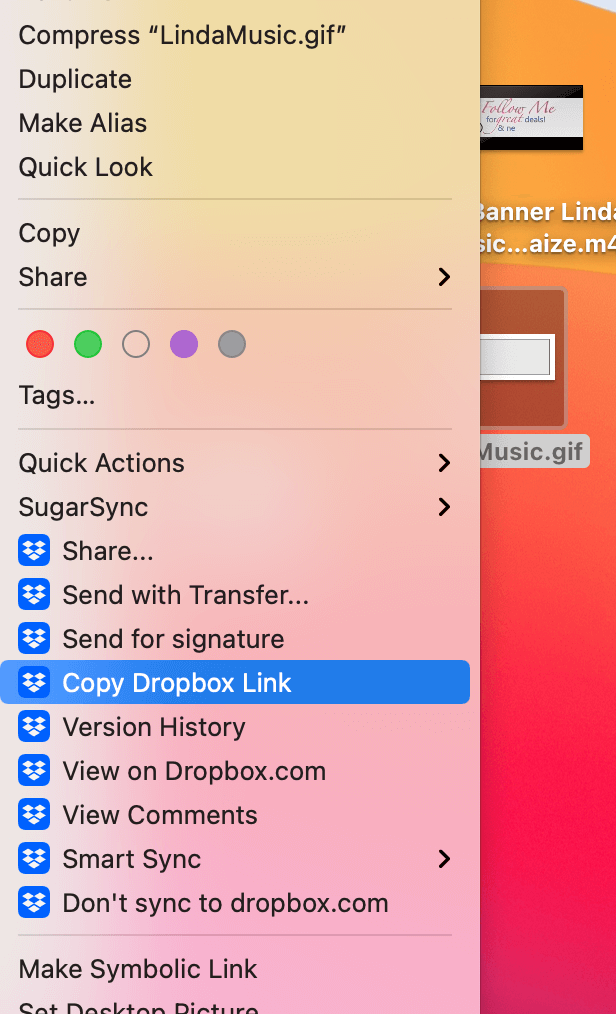

The next step is to upload your gif to the third-party hosting of your choice. Third-party hosting just means that you will use a link on TpT to point to an image somewhere else on the internet.
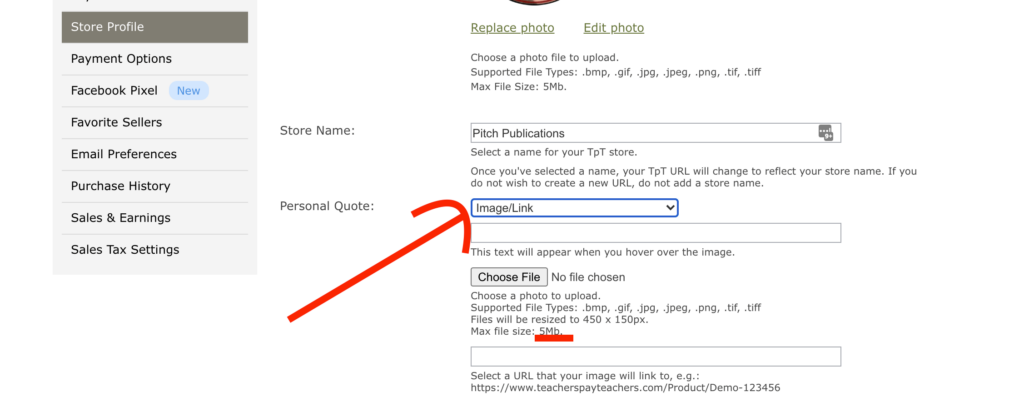
Alternatively, if your gif is below 5MB in size, you can upload it directly to TpT!
Do NOT use Photobucket.com anymore (this used to be the #1 option). Photobucket now charges $400 a year for this service.
I will cover three options: Pinterest, WordPress, and Blogger.
You can use a secret board or a public board for this. Though I have not done it for my store, others have very successfully. Note: Your gif file cannot be over 10mb. I do not use Pinterest because many of my banners are pretty big.
1. Upload a pin as you normally would. If you are on a secret board, do not worry about where it points to or what the description is. No one is pinning it! But if you want to display it on TpT, then why not actually pin it too?
2. Go to that pin. Right-click and click Copy Image Address. This is the link you will paste into a link shortener in the next step. Note: Some people are reporting that Pinterest is not working right. But if you want to try to use Pinterest, go for it!
If your blog is hosted on WordPress, you can upload your gif to your media section. You do not have to put it in a blog post.
I used an old blogger blog I use for testing when I am coding for clients. I created a draft post (you don’t ever have to post it!). Note: I am getting some reports of blogger having issues! Use with caution!
4. Save your draft (you do NOT have to publish, but do save it!)
You must shorten the url because of the TpT restrictions on how many characters in your quote area.
NOTE: DO NOT USE Bit.ly! Bitly has started marking these images as SPAM and will not show it in your TpT store! Try one of these two things:
1. Tiny Url. Just paste your link and then copy the new one! A new link might look like this now:
https://tinyurl.com/123adfd5Repeat this process for both the destination link and image link.
2. Pretty Links. If you are on WordPress, install the plugin Pretty Links and you can shorten your links using your custom domain.
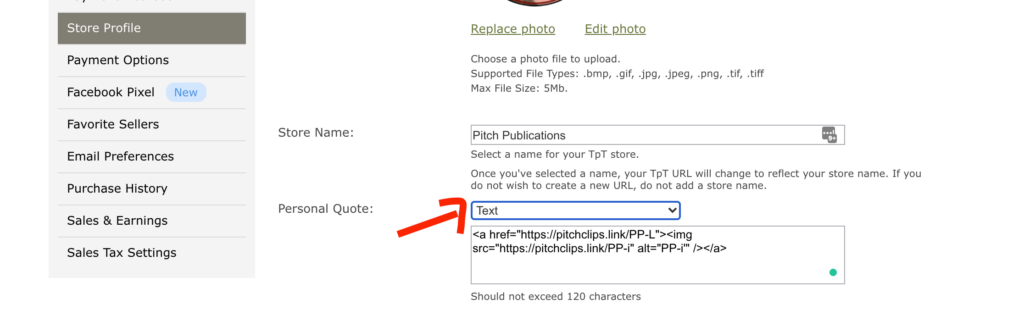
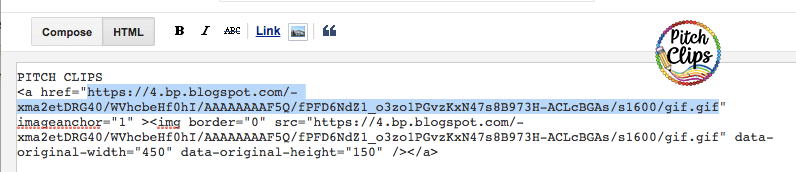
<a href=”DestinationLink”><img src=”ImageLink” /></a>*DestinationLink – Replace the word DestinationLink with whatever web address you want buyers to go to if they click your picture. TpT has now asked that we only link to links on TpT.
Note: You CANNOT put more than one link. I would love to link to each product, but we are limited to one link.
*PICTURE – Replace the word ImageLink with the link to your Gif.
*WIERD BUG – MANY people have had trouble with the correct code and the banner still not working. Turns out pasted quotes ( ” ) are having trouble rendering. So paste your code, then manually delete and retype each ” – this fixes the problem 90% of the time! (It has something to do with formatted code if you care, lol).
<a href=”http://tinyurl.com/tptquotebanner”><img src=”http://tinyurl.com/2sujZOy” /></a>

Which comes out to:

[ninja_form id=7]
I used this process to make a quick pin for this post. (Feel free to re-pin it 😉 ). Note: pins only animate when uploaded to Pinterest or repinned from Pinterest. Pinning from a website does not allow for animation.


8 Responses
Thank you sooooo much! I was able to create my rotating banner easily with your instructions above.
Looks fabulous!!!!
Thank you so much for this easy to follow tutorial!!!
You are welcome!!
Thank you so much!!!!!!! This is awesome!!!
You are so welcome! Banner looks great!!
THANK YOU!!!!! I spent over an hour trying to do this and could not figure it out!! I knew you had a tutorial and having the code here was extremely helpful! I had respaced stuff on mine and completely messed it up! I cut/pasted yours exactly how you had it and just swapped out my product/GIF and it worked!! Thank you again!!!
Oh yay!! I am so glad you figured it out! Glad to help, Andrea! 🙂