
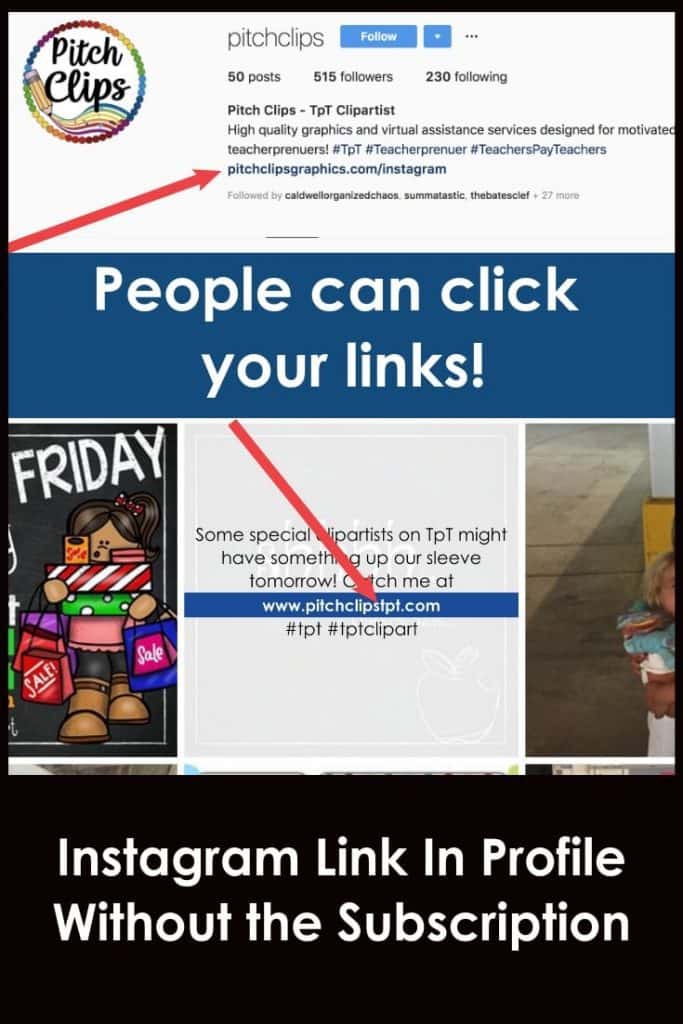
With a little time and effort, you can use your WordPress website and the plugin, Essential Grid, to create a link in profile page for Instagram without the subscription costs.
Note: This post contains affiliate links – see full policy here.
I now use Tailwind’s SmartBio or https://spotlightwp.com/ It is super easy to set up and free to use, even if you aren’t using Tailwind services!
I LOVE Linkinprofile for Instagram. I truly do. If you aren’t familiar with it, basically it creates a page that automatically pulls your Instagram pictures and links that are in the post into one central location. You put a link in your profile to your Linkinprofile page (see where they get the name?) and voila! You have all your links there ready to go. It is $9.99/month and if you can afford it, do it! I paid for the service about 6 months for my primary music education account, and it was flawless.
However, I am not great at Instagram (#truthbomb). I am good at purchasing too many courses and subscription services (#iwantitall). This year at tax time, I looked at my business expenses and about had a heart attack. So I sat down and wrote out every business subscription I had, and began looking for ways of either 1) manually doing the task or 2) making a techy workaround.
In this case, I was able to work out a techy workaround with the most amazing WordPress plugin, Essential Grid.
Note: This post contains affiliate links. You can read my full disclosure policy here.
You need the following:
This process is not hard but there are a ton of steps. This is something you visually need to see. Watch the video below and pause the video as you do each part. I listed the overarching steps below (I cover them all in great detail in the video!!!).
When you are writing your instagram captions now, the link MUST be within the word count you specified for displaying your caption. This means if you said pull in 25 words and your link is word 30, the link WILL NOT APPEAR! I know it feels weird to put your link higher in your caption, but do it anyway.
Feel free to change any settings you saw in the video! The plugin is so versatile!
Also remember you can add additional information to your new Instagram page on your website.
Let me know if you get stuck or something doesn’t quite work as intended! If you just don’t want to deal with this, I do offer this as a service. Go here to read more about it. Happy coding! Remember to pin for later!


2 Responses
Hey Shelley! I’m following along right now and I’m at the part where you’re customizing the skins. Would there be a reason I’m only getting 4 generic options instead of 5 pages (including social media) like you have?
Hey Rachel! This tutorial is a couple of years old so they may have changed things around. I know you might have just gotten Essential Grid (which is a GREAT plugin), but you might check out the plugin https://spotlightwp.com. I have a huge tutorial in my client portal for that one and it is SUPER fancy. I’m currently using SmartBio from Tailwind but if I were to use a custom solution I would actually use Spotlight at this time 🙂
Either way, shoot me an email and I can take a closer look if need be 🙂